Chocolate Heart Cake Pops
Highlighted under: Baking & Desserts
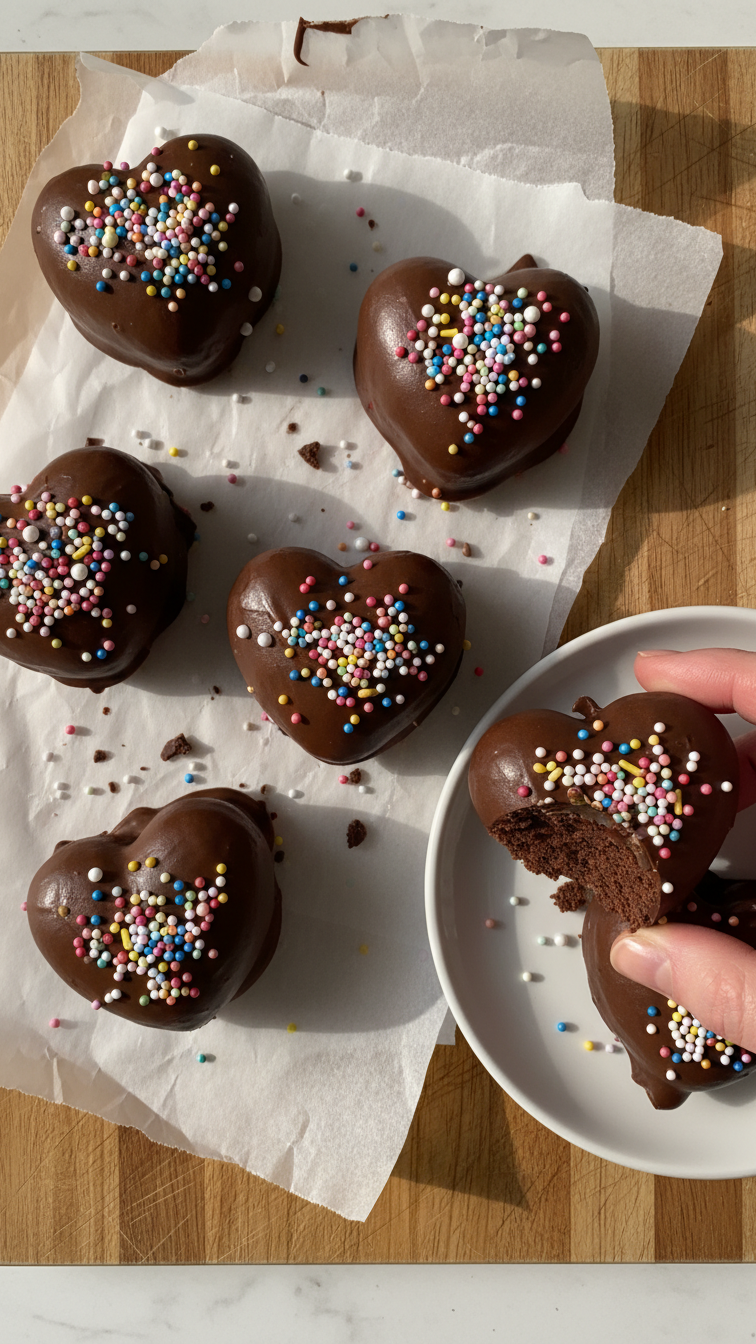
I love creating sweet treats that bring joy to any occasion, and these Chocolate Heart Cake Pops are a perfect example. They are not only visually appealing but also deliciously rich in flavor. I enjoy making them for celebrations or just as a fun activity with friends and family. The heart shape adds a special touch, making them ideal for Valentine's Day or anniversaries. With a simple chocolate cake base and a creamy coating, these cake pops are a delightful way to indulge in something sweet. Give them a try!
When I first made these cake pops, I knew I had stumbled upon something special. The combination of the moist chocolate cake with the smooth candy coating creates a mouth-watering effect. One of the best tips I can offer is to ensure the cake crumbs are tightly compacted with the frosting to avoid any crumbling when dipping. This makes a world of difference in the finished product!
Another thing I love about these cake pops is their versatility. You can customize the flavor by adding different extracts or using white chocolate for coating. This inspired me to experiment with flavors like orange zest or peppermint. There's always something new to discover and enjoy!
Why You'll Love These Cake Pops
- Adorable heart shape perfect for any occasion
- Rich chocolate flavor that satisfies any sweet tooth
- Fun to make and decorate with friends and family
Tips for Baking the Perfect Chocolate Cake
When making the cake base for your Chocolate Heart Cake Pops, pay special attention to the mixing technique. Combine your dry ingredients first, ensuring there are no lumps in your cocoa powder and flour. This step is crucial for achieving a light and fluffy cake. Once you add the wet ingredients, mix them until just combined—overmixing can lead to a dense texture that won’t crumble nicely for your cake pops.
To check if your cake is done, use the toothpick test. Insert a toothpick into the center of the cake; if it comes out clean or with just a few crumbs attached, it’s ready to come out of the oven. Also, let the cake cool in the pan for about 10-15 minutes before transferring it to a wire rack. This prevents excess steam from making the cake soggy.
Shaping and Assembling Your Cake Pops
When shaping your cake pops, aim for uniform sizes to ensure even coating, which helps with presentation and reduces any potential cracking. I usually use a small cookie cutter to help achieve the perfect heart shape. Before shaping, make sure the mixture is adequately chilled and holds together easily. If it crumbles too much, add a little more frosting or cream cheese to create a cohesive mixture.
Freezing the shaped pops for about 15-30 minutes not only firms them up but also helps prevent the sticks from separating during the coating process. If you're having trouble getting the sticks to stay in the cake pops, a quick dip of the stick into the melted chocolate before inserting it can work wonders, creating a better bond.
Creative Coating and Decorating Options
To achieve a smooth and glossy finish on your cake pops, temper the chocolate candy melts. Make sure not to overheat them; using the microwave at 50% power in 30-second intervals will give you more control and prevent burning. If the coating seems too thick, adding a teaspoon of vegetable oil can help thin it out, allowing for an even coat on your pops.
Feel free to get creative with the decorations. Use colored sprinkles, edible glitter, or even crushed nuts to give your cake pops a personal touch. For a fun twist, try drizzling melted white chocolate over the coated pops for a contrasting effect. These additional layers add flavor and visual interest, making them even more delightful for any celebration.
Ingredients
For the Cake
- 1 cup all-purpose flour
- 1 cup granulated sugar
- 1/2 cup unsweetened cocoa powder
- 1 tsp baking powder
- 1/2 tsp baking soda
- 1/4 tsp salt
- 1/2 cup buttermilk
- 1/2 cup vegetable oil
- 2 large eggs
- 1 tsp vanilla extract
For the Coating
- 1 1/2 cups chocolate candy melts
- Sprinkles or edible glitter (optional)
- Lollipop sticks
Instructions
Bake the Cake
Preheat the oven to 350°F (175°C). Grease and flour an 8-inch round cake pan. In a large bowl, mix together the flour, sugar, cocoa powder, baking powder, baking soda, and salt. Add the buttermilk, vegetable oil, eggs, and vanilla extract. Mix until smooth. Pour the batter into the prepared pan and bake for 20 minutes, or until a toothpick inserted into the center comes out clean.
Prepare the Cake Crumbs
Allow the cake to cool completely. Crumble the cooled cake into a large bowl. Add 1/2 cup of frosting or cream cheese, mixing well until the crumbs hold together when pressed.
Shape the Cake Pops
Using your hands, form the cake mixture into small heart shapes. Insert a lollipop stick into the base of each heart. Freeze for at least 15 minutes to firm them up.
Coat the Cake Pops
Melt the chocolate candy melts according to package instructions. Dip each heart pop into the melted chocolate, ensuring it is fully coated. Allow excess chocolate to drip off, then sprinkle with any desired toppings.
Let Set
Place the coated cake pops upright in a styrofoam block or a decorated container to set. Allow them to cool completely before serving.
Pro Tips
- For a fun twist, try using different flavored cake for the base, like red velvet or lemon. Don't forget to let the cake pops cool completely before dipping them to avoid melting the coating!
Storage and Make-Ahead Suggestions
These Chocolate Heart Cake Pops can be made ahead of time and stored for up to a week in the refrigerator. To keep them fresh, place them in an airtight container lined with parchment paper. If you're planning a party, making them a day or two in advance can save you time and stress on the big day.
If you want to freeze them, prepare the pops up to the coating step, and freeze them on the sticks for up to a month. Once frozen, dip them in chocolate and decorate as per your liking. Just let them sit at room temperature for a few minutes before coating, so the chocolate adheres better.
Ingredient Substitutions and Dietary Adjustments
For those looking to make these cake pops gluten-free, simply substitute the all-purpose flour with a gluten-free blend that includes xanthan gum. This ensures a structure similar to traditional cake without compromising on texture. Additionally, if you're avoiding dairy, almond milk can be used in place of buttermilk with a splash of vinegar or lemon juice to mimic the acidity.
If you’re interested in reducing sugar, look for sugar-free chocolate melts that cater to specific dietary needs. This modification works particularly well for those managing their sugar intake while still enjoying a sweet treat. Just be mindful of how these alternatives might impact the baking and coating processes.
Troubleshooting Common Issues
Sometimes, your chocolate coating may not adhere nicely. If this happens, check your pops' temperature before dipping them into the chocolate. They should be slightly chilled, not frozen as this can lead to cracking when the warm chocolate hits them. If you find that the chocolate coating is clumpy, reheat it gently with a touch of shortening to smooth it out.
If your cake pops are too crumbly after crumbling them, it might be due to insufficient frosting in the mixture. Don’t hesitate to adjust the frosting amount gradually until you achieve a dough-like consistency that binds well. Conversely, if they’re too gooey, allow the mixture to chill for additional time in the fridge before shaping.
Questions About Recipes
→ Can I make these cake pops ahead of time?
Yes, you can prepare the cake pops a day or two in advance and store them in the refrigerator until you're ready to serve.
→ What can I use instead of candy melts?
You can use chocolate chips, but make sure to add a bit of vegetable shortening to help them melt smoothly.
→ How do I store leftover cake pops?
Store your cake pops in an airtight container in the refrigerator for up to a week.
→ Can I freeze these cake pops?
Yes, you can freeze them! Just make sure they are wrapped individually in plastic wrap and placed in a freezer-safe container.
Chocolate Heart Cake Pops
Created by: The Bitealchemy Team
Recipe Type: Baking & Desserts
Skill Level: Easy
Final Quantity: 20 pops
What You'll Need
For the Cake
- 1 cup all-purpose flour
- 1 cup granulated sugar
- 1/2 cup unsweetened cocoa powder
- 1 tsp baking powder
- 1/2 tsp baking soda
- 1/4 tsp salt
- 1/2 cup buttermilk
- 1/2 cup vegetable oil
- 2 large eggs
- 1 tsp vanilla extract
For the Coating
- 1 1/2 cups chocolate candy melts
- Sprinkles or edible glitter (optional)
- Lollipop sticks
How-To Steps
Preheat the oven to 350°F (175°C). Grease and flour an 8-inch round cake pan. In a large bowl, mix together the flour, sugar, cocoa powder, baking powder, baking soda, and salt. Add the buttermilk, vegetable oil, eggs, and vanilla extract. Mix until smooth. Pour the batter into the prepared pan and bake for 20 minutes, or until a toothpick inserted into the center comes out clean.
Allow the cake to cool completely. Crumble the cooled cake into a large bowl. Add 1/2 cup of frosting or cream cheese, mixing well until the crumbs hold together when pressed.
Using your hands, form the cake mixture into small heart shapes. Insert a lollipop stick into the base of each heart. Freeze for at least 15 minutes to firm them up.
Melt the chocolate candy melts according to package instructions. Dip each heart pop into the melted chocolate, ensuring it is fully coated. Allow excess chocolate to drip off, then sprinkle with any desired toppings.
Place the coated cake pops upright in a styrofoam block or a decorated container to set. Allow them to cool completely before serving.
Extra Tips
- For a fun twist, try using different flavored cake for the base, like red velvet or lemon. Don't forget to let the cake pops cool completely before dipping them to avoid melting the coating!
Nutritional Breakdown (Per Serving)
- Calories: 180 kcal
- Total Fat: 9g
- Saturated Fat: 5g
- Cholesterol: 50mg
- Sodium: 70mg
- Total Carbohydrates: 24g
- Dietary Fiber: 1g
- Sugars: 15g
- Protein: 2g